Project Scaffolding
Reduce your time-to-first-deployed-artifact from 15 minutes of manual commands to a single skillmeat scaffold --full command or a quick web form. Project Scaffolding orchestrates project initialization, deployment of org-standard "Project Starters," and next-step guidance in one cohesive flow.
Overview
Project Scaffolding is the fastest way to set up a new AI-assisted project. Whether you prefer the CLI or web interface, you can arrive at a fully registered SkillMeat project with:
- Initialized project directory (
.claude/, platform-specific configs) - Org-standard artifacts deployed (skills, agents, context files, workflows)
- Clear next steps for PRD-driven artifact curation
Both flows take 3–5 minutes from start to finish, compared to 10–15 minutes when manually running init, add, and deploy commands separately.
What Are Project Starters?
Project Starters are pre-curated bundles of artifacts that every new project in your organization should include. These typically contain:
- Planning skills — PRD structuring, scoping, requirements analysis
- Debug context — Common debugging patterns, log analysis templates
- DevOps agents — Deployment helpers, CI/CD integration agents
- Baseline workflows — Onboarding templates, PR review workflows
Your org admin manages which bundles are deployed as starters via the /templates admin page. When you scaffold a new project, all enabled starters are deployed automatically.
CLI Flow
Use the command line for a guided, interactive setup or a fast non-interactive deploy.
Full Scaffolding: Interactive Setup
The --full flag orchestrates a complete new-project flow in your current directory (or specify --project <path>).
This command will:
- Detect if your directory is already a SkillMeat project. If not, it launches an interactive setup:
- Project name
- Project description
- Which platforms you'll use (Claude Code, Cursor, Codex, Gemini, etc.)
-
Whether to use an existing spec/PRD file or generate a placeholder
-
Deploy Project Starters — automatically deploys all enabled org-standard artifacts to your new project.
-
Print next steps — shows a copy-pastable command to run
/scaffold:projectin your agent for PRD-driven curation.
Example session (TTY/interactive):
$ cd my-new-project
$ skillmeat scaffold --full

✓ Initializing SkillMeat project...
  Project name: my-feature
  Description: An AI-assisted feature development environment
  Platforms: claude-code, cursor
  Use existing spec? (y/path/n): n

  Placeholder PRD created at docs/PRD.md

✓ Deploying Project Starters...
  [████████████████████░░░░░░░░░░░░] 5/7 starters deployed

  Summary:
  ✓ planning-workflow       (v1.0.0)
  ✓ debug-context           (v2.1.0)
  ✓ devops-agents           (v1.5.0)
  ✓ review-workflow         (v3.0.0)
  ✓ onboarding-template     (v1.2.0)

✓ Done! Next step:
  Open Claude Code and run:
  /scaffold:project --project my-feature
Standard Deploy Only
If your project is already initialized and you only want to deploy starters without running init:
This is useful for: - Applying fresh starters to an existing project - CI/CD pipelines where init is pre-done - Re-deploying starters after they've been updated by your org admin
Non-Interactive / CI Mode
For CI pipelines or non-TTY environments, use the --no-input flag:
In this mode: - If your project is already initialized, starters deploy and the command exits successfully (exit code 0) - If your project is not initialized, the command exits with a clear error message (exit code non-zero) explaining that interactive setup is required
This prevents CI pipelines from hanging on prompts while allowing them to deploy starters to pre-initialized projects.
Listing Project Starters
To see which starters are available and enabled for your org:
Output:
┏━━━━━━━━━━━━━━━━━━━━━━┳━━━━━━━━┳━━━━━━━━━━┳━━━━━━━━━┓
┃ Name                 ┃ Kind   ┃ Version  ┃ Enabled ┃
┡━━━━━━━━━━━━━━━━━━━━━━╇━━━━━━━━╇━━━━━━━━━━╇━━━━━━━━━┩
│ planning-workflow    │ starter│ v1.0.0   │ ✓       │
│ debug-context        │ starter│ v2.1.0   │ ✓       │
│ devops-agents        │ starter│ v1.5.0   │ ✓       │
│ legacy-context       │ starter│ v0.8.0   │ ✗       │
└──────────────────────┴────────┴──────────┴─────────┘
Demo: Full Scaffolding Flow
The following demo shows skillmeat scaffold --full running from start to finish in an empty directory — from interactive init through starter deployment to the next-step hint.
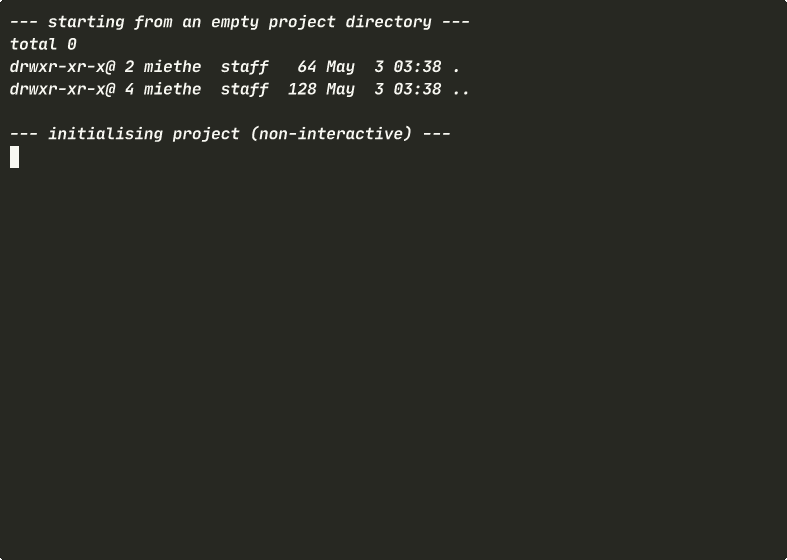
What you'll see (~2-3 minutes):
- An empty project directory — no files, no
.claude/, no config. - The interactive init prompts: project name, description, platform selection, placeholder PRD.
- Project Starters fetched from the API and deployed automatically.
- The "Scaffold complete" Rich panel with a copy-pastable next-step command.
- The resulting
.claude/directory structure and artifact list.
Replay the raw cast
The asciinema cast for this demo is available at
demos/scenarios/cli-scaffold-full/cast.json in the repository.
Play it locally with:
Cast pending capture
The GIF above will be populated once the demo cast is captured and rendered
against a live SkillMeat API. See demos/scenarios/cli-scaffold-full/review.md
for capture instructions if the image does not load.
Web UI Flow
The web interface provides a visual, form-driven scaffolding experience. Use this if you prefer GUI interactions or want to upload files directly.
Opening the New Project Dialog
From the SkillMeat web UI (http://localhost:3000 in dev mode):
- Navigate to Projects or click + New Project
- The "Create New Project" dialog opens with four main sections:
Step 1: Project Basics
Fill in the project name and path:
- Project Name (required): A short identifier for your project (e.g.,
my-feature) - Project Path (required): Where the project directory will be created (e.g.,
/Users/me/projects/my-feature) - Description (optional): A brief description of the project's purpose
Step 2: Platforms (Multi-Select)
Select which platforms you'll use with this project:
- Claude Code — Official Claude IDE
- Cursor — Cursor IDE
- Codex — (if available)
- Gemini — Google's Gemini
- Bob Shell — Remote execution
- Other — Custom or unsupported platforms
The platform list is fetched from your API at dialog load time (not hardcoded), so it always reflects your org's current configuration. Select one or more; each creates a separate deployment profile in .codex/, .cursor/, etc.
Platform selection screenshot
A screenshot of the platform multi-select section will be added here. Target: Create New Project dialog, platforms row visible.
Step 3: Spec/PRD Upload (Optional)
If you have an existing project specification or PRD, upload it here. Three input options:
Option A: File Picker
- Click the file picker button
- Select a .md file from your computer
- Max file size: 1 MB
Option B: Paste Markdown - Click the "Paste" tab - Copy and paste your spec/PRD content directly
Option C: Repo File Path
- Click the "Path" tab
- Enter a file path (e.g., /Users/me/projects/my-feature/docs/PRD.md)
- The backend will reference this path without storing the content in the database
Why optional? If you don't upload a spec now, the project init step will generate a placeholder PRD template (docs/PRD.md) that you can fill in later.
Spec upload screenshot
A screenshot of the spec upload section will be added here. Target: Create New Project dialog, spec upload field with file/paste/path tabs.
Step 4: Project Starters (Multi-Select)
Select which of your org's Project Starters to deploy. By default, all enabled starters are pre-checked:
- Uncheck any you don't want included
- Check additional starters if they were disabled by default
- Hover for descriptions of each starter
Starters selector screenshot
A screenshot of the starters selector section will be added here. Target: Create New Project dialog, starter list with checkboxes.
Submit & Next Steps
Click Create Project.
The dialog will: 1. Create the project directory and register it in SkillMeat 2. Deploy all selected starters to your new project 3. Display a success callout with the next step:
✓ Project created successfully.

Next step: Open Claude Code and run:
  /scaffold:project --project my-feature

This will analyze your PRD and deploy additional domain-specific artifacts.
The /scaffold:project command is copy-pastable — click the code block to copy it to your clipboard.
Success callout screenshot
A screenshot of the post-submit success callout will be added here. Target: Success message or alert after Create Project button.
Next Steps: PRD-Driven Curation
After scaffolding completes (via CLI or web UI), your project has:
- A working
.claude/directory with platform configs - Org-standard starters deployed and ready
- A placeholder or uploaded PRD
To add domain-specific artifacts tailored to your project, run the /scaffold:project command in Claude Code or your agent IDE:
This invokes the project-scaffolder agent skill, which will:
- Analyze your PRD
- Interview you about requirements and constraints
- Curate additional artifacts on top of your starters
- Preview and deploy the bundle
See the project-scaffolder skill documentation for full details.
Instance Starter Bundle
The Instance Starter Bundle is a complete, pre-packaged collection of SkillMeat's development methodology that you can deploy to new projects in a single operation. It includes everything your team needs to adopt a standardized AI-assisted development workflow: methodology rules, reusable skills, agent definitions, configuration templates, validation specs, and more.
What's Included
The Instance Starter Bundle comes in three tiers:
Core Tier (Always Included)
The foundation of SkillMeat methodology:
- 5 Methodology Rules — Global conventions for development practices (context budgeting, debugging, API patterns, authentication, LSP diagnostics)
- 9 Core Skill Frameworks — Orchestration and execution engines for:
dev-execution— Phase planning, batch delegation, completion validationartifact-tracking— Progress status management, task lifecycleplanning— PRD structuring, requirement analysis, implementation plansdebugging— Symbol-first debugging patterns, error investigationsymbols— Codebase symbol query and discoveryconfidence-check— Code validation and review readinessrecovering-sessions— Context recovery after interruptionsskill-builder— Creating and refining custom skillsskill-creator— Skill scaffolding and packaging- 47 Pre-Configured Agent Definitions — Role-based agents for backend, frontend, planning, review, validation, and specialized tasks
- Workflow Commands — CLI shortcuts for
/dev:execute-phase,/plan:*,/fix:debug, and other common tasks - Configuration & Templates —
CLAUDE.md,intent.md,.claude/config/files, PM templates, and validation schemas - Methodology Specs — Architecture decision records, artifact type references, data flow patterns, and testing guidelines
Recommended Tier
16+ additional skills for domain-specific work:
- Design and aesthetic frameworks
- Testing and quality assurance
- Integration and CI/CD helpers
- Advanced debugging and profiling
- And more (org-specific)
All Tier
Complete bundle including experimental and future-forward skills.
Using Instance Starters with CLI
If you're a project maintainer or platform engineer, use the build script to generate a customized Instance Starter Bundle:
python scripts/build-starter-bundle.py \
  --project-name "MyProject" \
  --project-description "AI-assisted Python backend with React frontend" \
  --author "Your Team" \
  --architecture-description "FastAPI + PostgreSQL + Next.js 15" \
  --output dist/starter-bundle/
Available Options:
| Option | Type | Required | Example |
|---|---|---|---|
--project-name |
string | Yes | "MyProject" |
--project-description |
string | Yes | "Feature development environment" |
--author |
string | Yes | "Your Team" |
--architecture-description |
string | Yes | "FastAPI + PostgreSQL" |
--output |
path | No | dist/starter-bundle/ (default: dist/) |
--tier |
choice | No | core (default), recommended, all |
--dry-run |
flag | No | Preview without writing files |
--verbose |
flag | No | Detailed build progress output |
Example with Recommended Tier:
python scripts/build-starter-bundle.py \
  --project-name "DataPipeline" \
  --project-description "ETL orchestration system" \
  --author "Platform Team" \
  --architecture-description "Airflow + Spark + Kafka" \
  --tier recommended \
  --output dist/data-pipeline-bundle/
How Instance Starters Are Deployed
When you run skillmeat scaffold --full or use the web UI dialog:
- Starters are fetched from your org's registered templates (via
/api/v1/scaffold-templates?kind=project_starter). - All enabled starters are deployed automatically to the new project's
.claude/directory. - Your CLAUDE.md and intent.md are parameterized with project-specific values (name, description, author, architecture, build date).
The build script substitutes 5 variables only in template files:
PROJECT_NAME— Replaced with--project-namevaluePROJECT_DESCRIPTION— Replaced with--project-descriptionvalueAUTHOR— Replaced with--authorvalueARCHITECTURE_DESCRIPTION— Replaced with--architecture-descriptionvalueDATE— Replaced with today's date (YYYY-MM-DD format)
All other files are copied verbatim, preserving their exact content and structure. This ensures that methodology rules, skills, and agent definitions remain consistent across all projects.
Updating Your Instance Starter Bundle
For platform engineers or maintainers, keep your Instance Starter Bundle in sync with your org's latest methodology:
- Edit the manifest — Update
scripts/starter-bundle-manifest.yamlto add, remove, or recategorize artifacts:
core_tier:
  - name: dev-execution
    type: skill
    source: ./.claude/skills/dev-execution/
    description: Phase planning and batch delegation
- Rebuild the bundle — Run the build script to regenerate
dist/starter-bundle/:
python scripts/build-starter-bundle.py \
  --project-name "YourProject" \
  --project-description "..." \
  --author "..." \
  --architecture-description "..."
- Re-register with SkillMeat — Add the updated bundle back to your collection:
skillmeat add dist/starter-bundle/
skillmeat template configure --enable --name "instance-starter-bundle-v2"
- New projects will use the latest version — All subsequent
skillmeat scaffold --fullcommands will deploy the updated bundle.
Security & Validation
The build script runs an automatic security pre-flight check that rejects bundles containing:
.envfiles or environment variable files*.token,*.key, or credential filessettings.local.*or local configuration overrides- Other recognized credential or secret patterns
If your build fails this check, remove sensitive files and rebuild. This protects new projects from accidentally inheriting leaked credentials.
When to Use Instance Starters
Use Instance Starters if you want to:
- Standardize methodology across multiple projects in your org
- Bootstrap new projects with all core rules, skills, and agents in one step
- Ensure consistent development practices from day one
- Deploy custom skills and agent configurations to all new projects
- Version-control your team's methodology as a self-contained bundle
If you prefer more flexibility, you can still manually add artifacts one-by-one using skillmeat add and skillmeat deploy.
Creating Your Own Starter Bundle
If you're a project maintainer or platform engineer, you can create custom starter bundles tailored to your organization's specific needs. This allows you to standardize methodology, skills, and configurations across all new projects.
Step 1: Prepare Your Artifact Collection
Gather all artifacts that should be included in your starter bundle. These typically include:
- Custom skills and agents configured for your team's workflow
- Methodology rules and configuration files (
.claude/directory structure) - Context packs and reusable templates
- Documentation and architectural guidelines
- CI/CD workflows and deployment helpers
Organize them in your SkillMeat collection or a dedicated source directory.
Step 2: Edit the Starter Bundle Manifest
Update the manifest file that defines which artifacts go into your bundle and how they're organized by tier:
# Edit the manifest (usually in your repo or SkillMeat source)
vim scripts/starter-bundle-manifest.yaml
The manifest uses this structure:
core_tier:
  - name: dev-execution
    type: skill
    source: ./.claude/skills/dev-execution/
    description: Phase planning and batch delegation

  - name: custom-agents
    type: agents
    source: ./.claude/agents/
    description: Pre-configured agents for your workflow

recommended_tier:
  - name: advanced-debug-context
    type: context
    source: ./context-packs/advanced-debugging/
    description: Advanced debugging patterns for your domain

all_tier:
  - name: experimental-skill
    type: skill
    source: ./experimental/future-skill/
    description: Cutting-edge experimental tools
Each entry requires:
- name — Identifier for the artifact
- type — One of: skill, agents, context, rules, config, template, workflow, spec
- source — Path to the artifact (relative or absolute)
- description — Brief description for users selecting starters
Step 3: Build the Bundle
Run the build script to package your artifacts into a distributable bundle:
python scripts/build-starter-bundle.py \
  --project-name "MyOrg" \
  --project-description "Standardized AI-assisted development methodology" \
  --author "Your Platform Team" \
  --architecture-description "Your team's tech stack and conventions" \
  --tier core \
  --output dist/starter-bundles/
Build options:
| Flag | Purpose |
|---|---|
--project-name |
Organization name (replaces PROJECT_NAME in templates) |
--project-description |
Bundle description (replaces PROJECT_DESCRIPTION) |
--author |
Creator or team name (replaces AUTHOR) |
--architecture-description |
Tech stack summary (replaces ARCHITECTURE_DESCRIPTION) |
--tier |
Which tier to include: core, recommended, or all (default: core) |
--output |
Output directory (default: dist/) |
--dry-run |
Preview without writing files |
--verbose |
Show detailed build progress |
The build script automatically validates your bundle for security (rejects .env, credential files, and other sensitive data) and generates a bundle.toml manifest with checksums.
Step 4: Register as a Template
After building, register your bundle with SkillMeat so it's available as a Project Starter:
# Import the bundle into your collection
skillmeat add dist/starter-bundles/MyOrg-bundle/

# Register it as a template available to all new projects
skillmeat template create \
  --kind project-starter \
  --name "my-org-starter-bundle" \
  --source dist/starter-bundles/MyOrg-bundle/ \
  --description "Complete methodology bundle for MyOrg projects" \
  --enable
Step 5: Deploy to Projects
Once registered, your starter bundle will automatically appear in:
- CLI:
skillmeat template list --kind project-starter - Web UI: The "Project Starters" multi-select in the New Project dialog
- Scaffold operations: All new projects via
skillmeat scaffold --full
When users create a new project, they'll see your bundle in the starter list with its description. They can enable or disable it like any other starter.
Maintaining and Versioning Your Bundle
As your organization evolves, keep your starter bundle up to date:
- Make changes — Edit artifact source files, update the manifest, adjust tier membership
- Rebuild — Run the build script with new parameters if needed
- Re-import — Add the updated bundle back to your collection with a new version tag
- Re-register — Update the template to point to the new version
- Communicate — Let your team know the bundle has been updated; new projects will automatically use it
Example versioning workflow:
# Build v2.0.0 with additional skills
python scripts/build-starter-bundle.py \
  --project-name "MyOrg" \
  --project-description "..." \
  --author "..." \
  --architecture-description "..." \
  --output dist/starter-bundles/v2.0.0/

# Import with version tag
skillmeat add dist/starter-bundles/v2.0.0/ --tag "v2.0.0"

# Update template registration
skillmeat template configure \
  --name "my-org-starter-bundle" \
  --update-source dist/starter-bundles/v2.0.0/
Related Documentation
For more detailed guidance, see:
- Bundle Composite Authoring Guide — How to structure and test bundles
- Starter Bundle Manifest Guide — Complete manifest reference and validation rules
- Project Scaffolding Troubleshooting — Common bundle creation issues
Troubleshooting
My scaffold command hangs in CI
Cause: Interactive prompts are running in a non-TTY environment.
Solution: Use the --no-input flag:
If your project is not yet initialized, this will fail fast with a clear error message instead of hanging.
I want to skip init and only deploy starters
Solution: Use the --standard flag:
This skips the interactive init prompts entirely and deploys only starters to your existing project.
The spec upload is limited to 1 MB
Reason: The dialog accepts spec content for reference and metadata, but the backend does not store large files. Path references are recorded without storing the actual content.
Solution: If your spec is larger than 1 MB, use the "Path" tab to reference it by file path, or split it into smaller markdown files and upload separately.
I want to see which starters are enabled
Solution: Run the CLI command:
Enabled starters have a checkmark (✓) in the rightmost column.
An org admin wants to change which starters deploy by default
Admin step: Go to Settings > Templates (or /templates in the web UI), find the "Project Starters" tab, and toggle the enable/disable switch next to each starter. Changes apply immediately to new projects.
Comparing Flows
| Aspect | CLI (--full) |
Web UI Dialog |
|---|---|---|
| Speed | 3–5 min (interactive) | 3–5 min (form-based) |
| File upload | Spec file path or placeholder | File picker, paste, or path |
| Platform selection | Comma-separated prompts | Checkboxes (visual) |
| Accessibility | Keyboard-navigable prompts | Full WCAG 2.1 AA (labels, focus, keyboard) |
| Non-TTY safe | Yes (--no-input) |
N/A (browser-based) |
| Batch automation | Yes (--standard in scripts) |
No (one project at a time) |
Related Guides
- Deploying Artifacts — How to deploy artifacts after scaffolding
- Collection Initialization & Configuration — Detailed init configuration
- Adding Artifacts to Your Collection — Manually add artifacts outside of scaffolding
- Advanced Workflows — Complex project setups and custom deployment chains
Questions? Check the SkillMeat FAQ or see the troubleshooting guide.